Showing posts with label Classroom Makeover. Show all posts

Wednesday, August 29, 2012

Near the Door...


I thought I'd talk about this picture for a minute...or five. I'm in a blogging mood tonight. (This is probably my "pencil sharpener." See below.) What should go by the door? Surprisingly, there's a lot there, and I've never thought about it before.
  • For starters--emergency escape procedures. That's what the posters on the wall are. The red card near the bottom is where the fire drill card is to record the date of the drill and who is there...or not there. Tape a class roster to the back in case you ever have a "guest teacher."
  • If you have a window in your entrance, I've heard you are supposed to cover it up as part of lock-down procedures. Does any one know this for sure?
  • There's a mirror under the black owl. This is new to the classroom, and I've discovered that the kids LOVE it. It's near the door, so they can only ever get a "quick check" as they come in and out of the classroom rather than "preening." Easy dollar store find. Use the foam mounting tape.
  • That wooden block on the wall just near the bright blue container was where our classroom pencil sharpener is...was. I found out that the newer pencil sharpeners are usually made from recycled parts of old sharpeners. When we had ours, it had to be replaced a lot because it kept breaking. It's also well-known that the kids like to use it when procrastinating. I actually asked the custodian to remove it and I put in an electric pencil sharpener. It has done wonders for the classroom--not a lot of procrastination with an electric pencil sharpener. If you don't want yours removed, I got this idea from a colleague--put a plastic sandwich bag over it when you don't want it to be used. That works very well, too. I still use that idea with the electric.
  • There is laminated black paper around the pencil sharpener (or what used to be the sharpener). The wall is dry wall and go figure...pencil sharpener + drywall = pencil holes and writing on the wall. Put laminated paper around it and there's no more holes and writing. They won't write on the wall farther away from the sharpener.
  • Put a poster behind the trash can. School trash cans are made of good old metal. Whether the wall is dry wall or concrete, those cans scuff the wall. Put a poster there or more laminated paper to protect the wall.
  • Put a small outdoor mat underneath the trash can and/or pencil sharpener. This protects the waxed floors from getting all dirty. It's not the custodian's fault if there is A LOT of dirt there. Heavy pencil marks on the floor will not scrub off unless you strip the wax and put new wax down.
  • Carpet squares are underneath the table. If you do not have any, it's a great idea. Usually you can have them donated to you by your local home improvement store.
  • Speaking of donations...AAA recycles their maps every few months. Ask for them to save them for you and give them a date when you'll pick them up.
  • Hall Passes: another great idea. Never thought of it until last year, but...if you do think about it, it is kind of gross that they take those to the bathroom with them. lol I started this last year, thanks to another colleague's idea-sharing. Have them put the pass on their desk instead. You still know where they are, the bathroom is in use because the pass isn't on the wall, and who is out, but the pass no longer gets bathroom germs.
  • My favorite poster on the wall above the light switch?--"I don't GIVE grades, YOU EARN THEM." with a picture of me on it. =)
  • The welcome mat at the door--so inviting. (Don't get a grass one, very messy.)
  • Pink sign hanging from the table in the lower right corner?--"Bear Cave." That's a reading nook. Kids LOVE crawling under things.

Photobucket

Tuesday, August 21, 2012

Classroom Forest Makeover

It's the night before school starts. Boy, am I tired. We had a teacher professional day today with the staff getting ready, and then I spent the afternoon and early evening doing some fine tuning for my classroom. Below are some pics I took today of my classroom makeover.
I put a welcome mat at the entrance to the classroom to greet the kids.
Classroom Door

I turned my table to add to the length of my desk. I had Lowe's cut me a piece of pegboard and attached it to the front of the desk using cable ties. The letter boxes, I got from Target. They were plain black, so I added washi tape and decal stickers and attached them with pegs. I created a classroom letter for the kids to read. The flag says "Don't give up the ship." It's the Battle of Lake Erie flag. I ordered all my flags a few years ago from an online flag store. (Sorry, don't remember the name.)
This is the calendar wall and behavior chart. I staple a desk calendar to the bulletin board and write all birthdays and important dates on it to save time later. The brown circle is the birthday wheel I created earlier. We also have the state seal and statehouse, a poem a friend gave, some words of wisdom on cooperation. The behavior chart allows kids to move up or down to allow them to improve and not feel "stuck." The markers are to mark their "color" in their agendas.
Brain breaks. The empty bucket is to put used activities so they don't have to repeat the same ones all the time.
Birthday pencils.
Treasure box and desk nameplate I made. (The all-important blue Thermos coffee mug in the background. A definite must-have. ;)
Classroom window. I made the curtains to go with my color scheme (Sorry, the pic is so dark. I'll try to get a better one later). I decorated the wall with kids' bedroom sticker decals from Target. The flags are greate for social studies lessons and Veterans' Day. They are the branches of the military and the American flag. There is one hanging terrarium in the window right now. There will be two more. I just got them today. =)


 The "Fishing Hole" reading nook. There are more flags in the back. They are all the flags that the US has ever had. The larger flag is a copy of "Old Glory" from the Battle of Fort Sumter. I put some stuffed animals in the chairs. They are good for reading time and test taking (stuffed animals are comforting). The black crates will get filled with recent read alouds and popular cookbooks (Kids LOVE looking and reading cookbooks and are always asking me to get more, even reluctant readers. Also, 3D books are great. The rule is to prove they read it and then they get 3D glasses.)
Owl bathroom mat I got from Target to mark the "Fern Gully" reading nook. Easily movable when it is not reading time. My dad is going to give me a small kids tent to put in the back.
Student table. The pink basket is for trash. I thought this would help them stop throwing garbage in their desks. There are 2 ginko leaf flyswatters for pointers, rulers, scissors, glue sticks, and crayons.
Classroom sink with some more wall decals my friends gave me for my birthday. I love them!
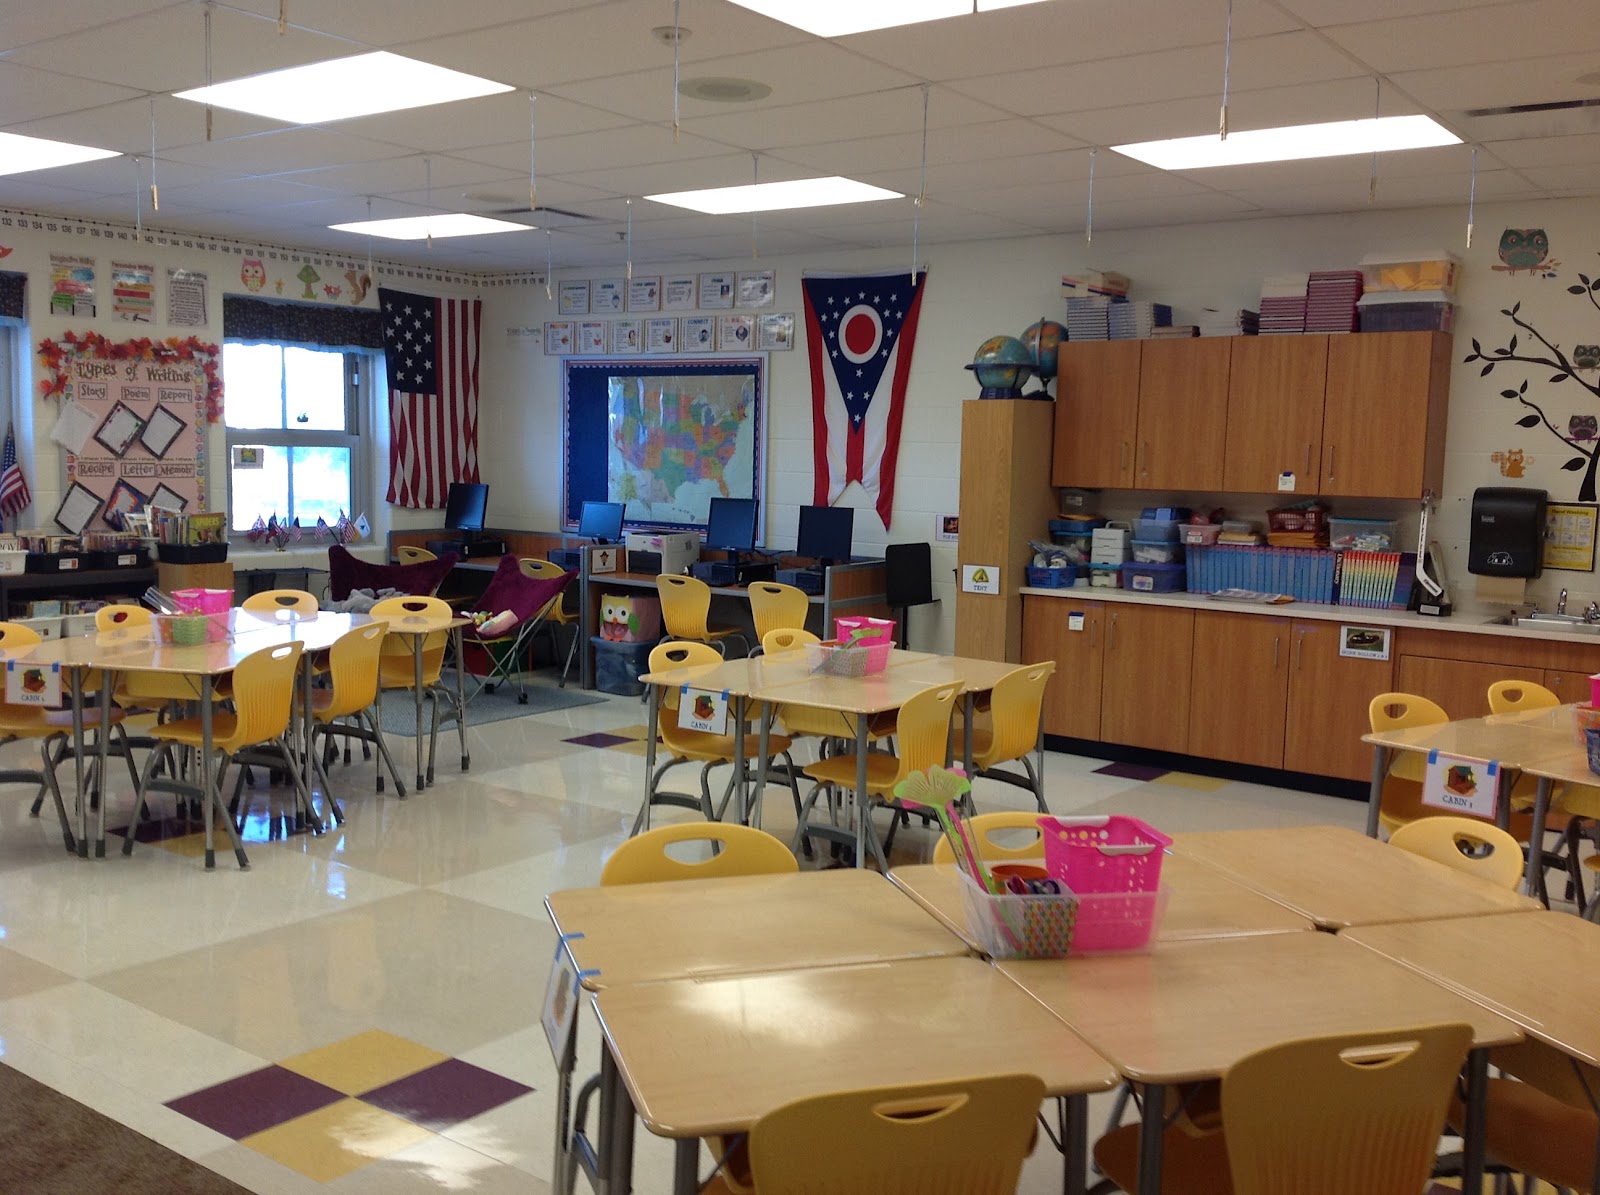
A view from the front of the room. There's the state flag (the flags make teaching social studies more fun). There are clothespin hanging from the ceiling. I usually put up large "baseball cards" of the kids that connect to our theme. They are similar to the "All About Me" activities. Pictures of each kid are on one side and the "All About Me" activity on the other.
A view from the back of the room.
More sticker decals from Target. I put up a mirror that I found at the Dollar Tree for the kids to look at themselves (they like to do that at this age level). A friend gifted me the black owl. He is also a chalkboard. I think I might put a piece of whiteboard tape on his belly since they are less messy, and use it to write a simple message of the day for the kids. He is the "Guardian of the Mirror," a rare breed of owl from Ga'Hoole.

There you have it, my classroom in a nutshell. Hopefully, I was able to give you some ideas. I will post some specific DIYs that I did later. Right now, plans for the first day and sleep are priority. =)

Have an OWL-standing school year!

Photobucket

Monday, August 20, 2012

Decorating Tips

I have been working hard trying to get my classroom ready for the first day of school, which happens to be Wednesday. It's not completely done yet, but all the little odds and ends should be done by tomorrow. I hope to take some pics to share with all of you.

In the meantime, here are some things I discovered while decorating my classroom:
  • Windows--Check if your window sills are magnetic...I wanted to hang things in the window this year, and I discovered that the top of the window sill is actually magnetic. If you are going to hang something light, like student writing, a hook magnet might work. For me, I'm hanging glass terrariums. I used magnetic hooks and outdoor mounting tape. This makes it permanent, but I'm confident it won't fall, which is a really good thing since it's glass. (It is probably a good idea to pop the magnets out first, because the glue holding the magnet in will eventually give way.)
  • Concrete brick walls--Clean them with rubbing alcohol...Hanging stuff on those things and keeping them up seems to be a constant battle. I know some teachers in my building use hot glue guns. If you have access to an outlet and a glue gun, try that. I have not tried it, but they all assure me it comes off clean. Me? I discovered from reading different  packages that if you clean the bricks with rubbing alcohol first, it helps things to stick better. It really does work, and then I just use frog tape or painter's tape. (FYI, take the rubbing alcohol home when you're done and clean the walls when the kids aren't around. Kids are not allowed to have access to this. Safety first.)
  • Assigning students numbers--Use calendar numbers...A lot of teachers assign their students numbers rather than putting their names on things to allow anonymity, and especially if something is going to be used year after year like a book box. I decided to go with this idea for the things I reuse, but I really didn't want to have to write numbers on everything. I wanted something printed rather than written. A simple solution--use the ready-made calendar numbers (hopefully no one will ever have a class bigger than 31...) They also do sell sticker sheets of just numbers in the scrapbook section at your local hobby store. They didn't seem like a readily available item (I got the last sticker sheet), so it might be better to order online.
  • Pinterest--If you are an avid Pinner and are looking for ideas for the classroom, don't forget to check the home section. Most of us are really good at thinking outside the box, and can turn a home idea into something for the classroom. In fact, I get more classroom decorating ideas from there than from the education tab.
  • Air Plants--These are what are going in the glass terrariums. They won't be ready before the kids get here, so I'll post it now. To be honest, I'm not a plant person (they usually die on me), but I thought air plants might be a good alternative. If you haven't heard of them, they are rootless plants that you spray or give a "bath" to once per week, and they don't need soil. They are small and come in a lot of different varieties. I'm sure it will provide great learning opportunities, too. If you are going to try them and get the terrariums, the tip is to order "votive candle holders." They are the same as "terrariums," but way cheaper. You can even use those clear plastic tree ornaments. Google it. They are fun!
 
Here's a pic of one of my air plants and the terrarium/votive holder. You can keep the terrariums plain like this or add decorative rocks, wood, moss, etc.

That's all for now, hopefully the classroom will be done tomorrow, and you will see pics to help give you some more ideas.

Have fun on the first day of school!!!!!!!
Photobucket

Tuesday, July 10, 2012

The Birthday Wheel


I needed to get a new sign to post classroom birthdays, but when I looked in the catalogs and at stores, I didn't really see any that caught my eye. I had been using a "birthday wheel" that I had gotten out of an educator's magazine, but it was filled with staple holes, marker stains, and tape remnants. It needed to be replaced.

I took all the things I loved from what I saw of birthday posters, birthday signs, my old "birthday wheel," and things I saw on Pinterest and made what you see. Come the fall, it will get laminated, and I thought I would have the kids get together by month to take a group picture. Then those pictures will get placed in the empty spaces for each month.

I like to use the different "-ology" symbols because:

1. The kids love to look at it and learn what they are.

2. It's great for discussions on symbolism.

3. The kids are reading. There may not be very many words on it, but those are some tough words (especially those flower names), and they are invested in figuring out what they say.

4. It leads to some great discussions and tie-ins when teaching Native Americans and other cultures along with mythology (which is mentioned in the common core).

5. The kids make great connections with the books they read. Those symbols and references to them are found all over literature.

and 6. I just think it's pretty, interesting, and I love making artsy stuff.

Photobucket

Monday, July 2, 2012

Decorative Clipboards That Get Used A LOT


I added a new DIY project. We've all probably seen those decorative clipboards with the scrapbook paper and the Mod Podge. I tried making those for the upcoming school year, but I didn't really like them. I thought they were too sticky feeling, which makes sense since Mod Podge is really just a glorified glue. In fact, I was working on them in my Florida room in this summer heat, and I had stacked them when I had finished. Big mistake. They ended up getting stuck together, and when I tried to get them apart, of course, I ripped the paper.

So, I thought--this is not going to work. We never know what the temperature in the room is going to be. Some days it is unbearably hot and other days it's a freezing meat locker. Plus, I thought, just holding it in my hands (which I'm always seen with a clipboard) might make it melt just from body heat.

I really liked the DIY clipboards though, so I came up with my own solution. I decided to use stickers instead of scrapbook paper and no finish. You can get a more instructional look at them from my "DIY tab." I thought it was a good solution. Take a look:


Photobucket

Friday, June 8, 2012

DIY: Desk Name Plate


I finished my first classroom DIY today. I made a new desk nameplate to go with the color scheme I chose for next year (pink and BROWN). I can't wait to put it on my desk. It's so cute, I'm hoping it will help me to keep my desk de-cluttered this year. A parent had given me the wooden cubes a few years ago for art along with a whole storage box full of other wooden ornaments from eggs and acorns to banister knobs and clothespins. We used a lot of it in art club, an after-school club I've supervised, but there still seems to be a whole boxful. I will have to look into what else I can make with all those wood ornaments. There are some mushrooms in there that I could use for something to go with my theme...maybe smurf houses? Will see...

When I went to buy the terracotta pots at the craft store (60 cents each, YES!), I also found some 30% off beads, so I bought a bunch of those. I'm thinking of making some beaded curtains to decorate the windows for my next DIY...
Here's a pic of my name plate.
Photobucket


Wednesday, June 6, 2012

Classroom Makeover Beginnings

I finished getting my room ready for the summer yesterday. Everything is stacked, put away, and off the floor, ready to be waxed. I've decided to give my room a total makeover.

In the past I've had posters all over the place of things I thought were important for the kids to see: reading strategies, writing strategies, test-taking skills, etc. All of the things most of us put up. But when I asked the kids if they liked the posters, they said they loved them and used them a lot, but they felt it was too much to look at, almost information overload. The plan is to make it look more inviting to a 9-year-old, without being overwhelmed by all the posters. =)

I started with a theme, the forest, since I love the great outdoors. I wanted to make the room more inviting for the kids and myself, a place everyone is excited to go to. The first order of business was to put up some wall decals. I figured if they stayed up all summer, they will stay up throughout the year. Here's a before and after.
 Here's another thing I did before the school year was over. We've all seen the "Types of Writing" bulletin board on Pinterest, probably. I made my own version of the bulletin and changed some of the types of writing to fit more with what I teach. I also had this year's kids make some first drafts of each type of writing for next year's kids to read. The plan is to display two pieces each. I think it worked out nicely. I love the story title, "Chicks with Brains."